By Ken Lain, the mountain gardener

Good, successful gardeners think like the plants they are growing. This is especially true when growing orchids indoors.
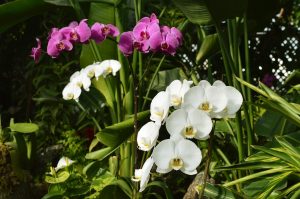
Orchids are native to tropic regions of Asia and Australia, such as the Himalayas and Philippines. In Asia, the Chinese adopted the term “butterfly orchid” to describe the aesthetics of this particular flower. The Greek name for orchids is “Phalaenopsis”, officially derived from the terms “phalaina” and “opsis” meaning “moth-like.”
 In tropical climates, Phalaenopsis orchids tend to grow on tree branches and between rocks, usually near a source of water. Besides a rainforest climate, orchids also are found in grassland areas like pastures. Orchids can adapt to many different types of environments, which is one of the reasons they are so easy to maintain! Duplicate these plants’ natural environments and they will thrive indoors.
Orchid examples on Watters Pinterest Page (Follow for more updates)
Optimal Growing Conditions for Orchid Plants
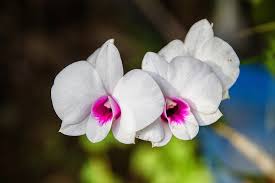
~ Bright light, but not direct late-afternoon sunlight, although Dendrobiums can handle more sun
~ High humidity
~ Turbulent airflow around the roots
~ Regular periods of drying out, alternating with drenching watering
~ Surrounding temperatures should range between 50 degrees F and 85 degrees F
The closer an orchid’s indoor growing area comes to duplicating these conditions, the more successful the plant and the larger its blooms.
Orchid roots are highly-specialized organs designed to soak up water very quickly and to breathe freely. However, most store-bought orchids come packaged in cheap plastic pots with the roots packed in soaked moss. This violates two of the main rules of successful growth: There is no air flow around the roots, and the roots are never given a chance to dry out completely. Thus, the plant cannot breathe so root rot is inevitable. Repotting your orchid from this suffocating packaging is essential.
Repotting for Success
The first step in repotting an orchid is: Don’t attempt to re-pot an orchid in bloom.
After blooming is finished, cut off the spent flower spike and repot the plant. Orchids should be planted into specialized orchid pots using a potting soil unique for orchids. Orchid potting soil is usually composed of several chunky ingredients that may include pine bark, charcoal, and even styrofoam! Several different sizes of orchid pots and the special soil are sold here at Watters Garden Center.
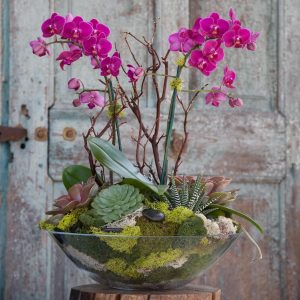
Orchid pots feature wide drainage slits, so water can run out freely from the bottom and the sides of the pot. As an out of bloom orchid plant isn’t much to look at, choose a colorful, decorative container; a pretty pot provides beauty to detract from the plant’s unsightly bareness.
Repotting your newly purchased orchid, follow these steps:
~ Remove the plant from the plastic pot and carefully lift off as much of the moss as possible. Healthy roots should be white and firm, with a small green growing point.
~ Cut away any shriveled, rotten, or blackened roots.
~ Set the plant into the pot and fill in around it with orchid potting soil. The plant should be firmly situated, but it will not be anchored entirely. Eventually, new roots will grow into the potting soil and attach to the pot itself, thus securing the plant.
~ Ideal orchid pot placement is in an east-facing window with a few hours of mild morning sun.
~ To provide humidity and catch run-off water place the planted container in a wide, deep tray or plate and fill with gravel. Allow water to drip into the tray; the gravel holds the plant up out of the water.
Proper Orchid Care
Caring for an orchid is simple. During the summer months water weekly and heavily. Let the water drench the roots and fill up the pebble tray; this provides the extra humidity the plant needs in summer.
It doesn’t hurt to put the pot in a few inches of water in the sink and let the plant really soak up the hydration it needs. This is especially important before an extended time away from the plant. Don’t worry about submitting an  orchid to this technique; a deep soaking won’t kill the plant as long as it’s allowed to dry out thoroughly.
During the growing season, feed weekly with a dilute solution of Watters ‘Flower Power 54’ plant food.
In winter keep the orchid warm and cut back watering to once a month or so. Mist it every so often to make sure it stays hydrated. Don’t fertilize in mid-winter.
If you see signs of distress, such as yellowing, wrinkled leaves, or no blooms, move the plant and keep tweaking its growing conditions. Once an orchid finds a happy spot and falls into a routine, the plant regularly will throw out new roots, leaves, and canes, depending on the variety, and show beautiful fresh blooms year after year.
Until next week, I’ll be helping local gardeners with their orchids here at Watters Garden Center.
Ken Lain can be found throughout the week at Watters Garden Center, 1815 W. Iron Springs Rd in Prescott, or contacted through his web site at WattersGardenCenter.com or FB.com/WattersGardenCenter .

