Flowers, Herbs, and Veggies You Can Plant in January

by Ken Lain, the mountain gardener

Audible Stories Provided by SignalsAZ.com
Fruit Tree Planting - Watters Mark

January isn’t thought of as a prime gardening month in Northern Arizona. Gardeners in Southern Arizona know it’s the perfect time for cool-season vegetables and flowers. It is warm enough to direct sow much of your garden, but keep your row covers handy. Even in frost-free deserts, January can be a complicated month for gardeners. Extremes and Arizona go hand-in-hand with unpredictable winter weather is always a gamble.

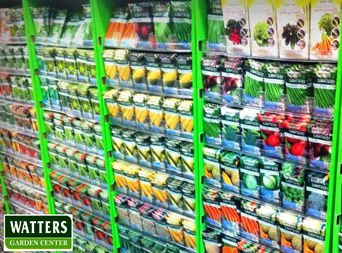
Weather and growing conditions vary widely in Arizona. Sudden storms and an unpredictable season make it difficult to know just when to start your vegetable and flower seeds in spring. Below are some guidelines based on USDA hardiness zones and your last expected frost date. Remember, hardiness zones measure the highest and lowest average temperatures. As always, be sure to use common sense and gardener instinct.

Seed Packet Display

USDA Zones 1 thru 5 – Bellemonte and White Mountains

  • If you’re in Zones 1 through 5, content yourself with growing something fresh indoors in January. Seeds for indoor microgreens are readily available in January. Plant a mix of your favorites like arugula, beet greens, mizuna, and pea shoots.
  • Even faster, try growing sprouts. They germinate in days and are packed with nutrients. Mix things up a bit and try radish, peas, and even sunflowers greens.
Seedlings in plastic wrap

USDA Zone 6 – Williams, Flagstaff, and Showlow

  • Zone 6 gardeners have more options in January than their Zones 1–5 counterparts.
  • Indoor Vegetables, Herbs, and Flowers
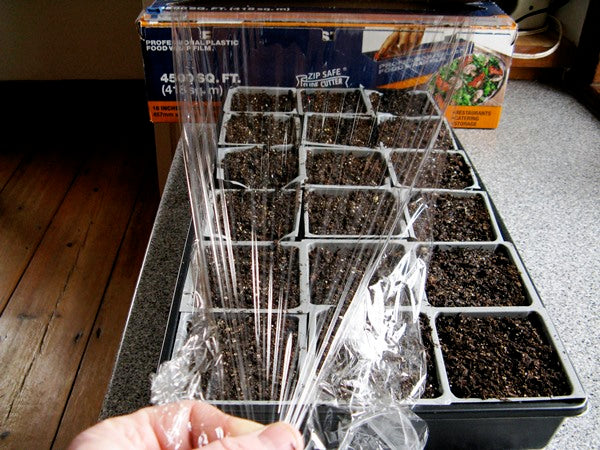
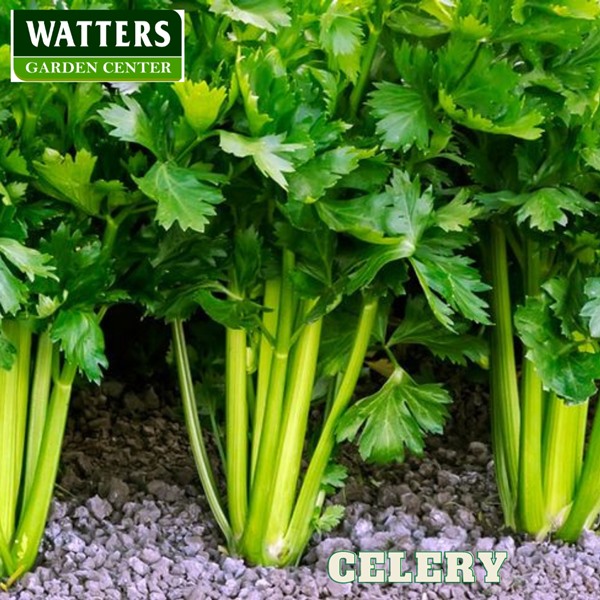
  • Now is the time to start seed indoors for notoriously slow-to-grow celery, parsley, onions, and leeks. Celery and parsley seeds need several weeks just to germinate. Plus, you have many seed choices like large yellow bulbs, red torpedos, and even doughnut-shaped cipollini.
  • Start early spring bloomers indoors under lights like begonia, browallia, delphinium, dusty miller, pansies, and snapdragons.
  • Outdoor Flowers
  • Daffodil and tulip bulbs you didn’t get to in Autumn can still be planted, but hurry. If the bulbs are still firm, you will have flowers this spring.
AZ Wildflower seed mix

USDA Zone 7 – Prescott, Payson, Chino & Prescott Valley,

  • January weather in zone 7 is some of the trickiest to predict but offers excellent possibilities.
  • Indoor Vegetable, Herbs, and Flowers
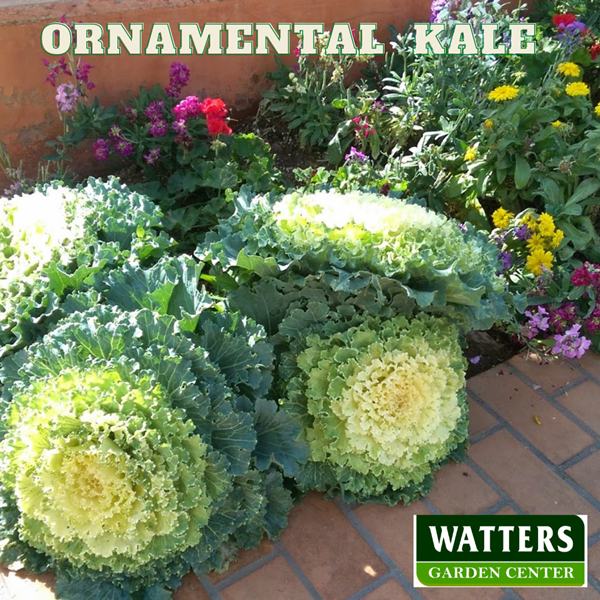
  • If you haven’t started your celery, parsley, leeks, and onions, get them started indoors. Toward the end of the month, you can also begin broccoli, cabbage, cauliflower, kale, and lettuce to transplant outdoors in March. 15 Vegetables Best Started by Seed
  • Seeds of geranium and coleus can be started at the end of the month. They need several months to mature into transplants.
  • Outdoor Flowers
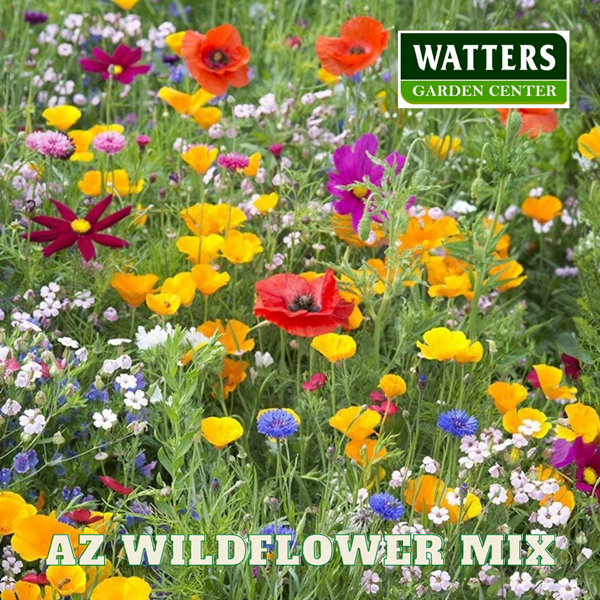
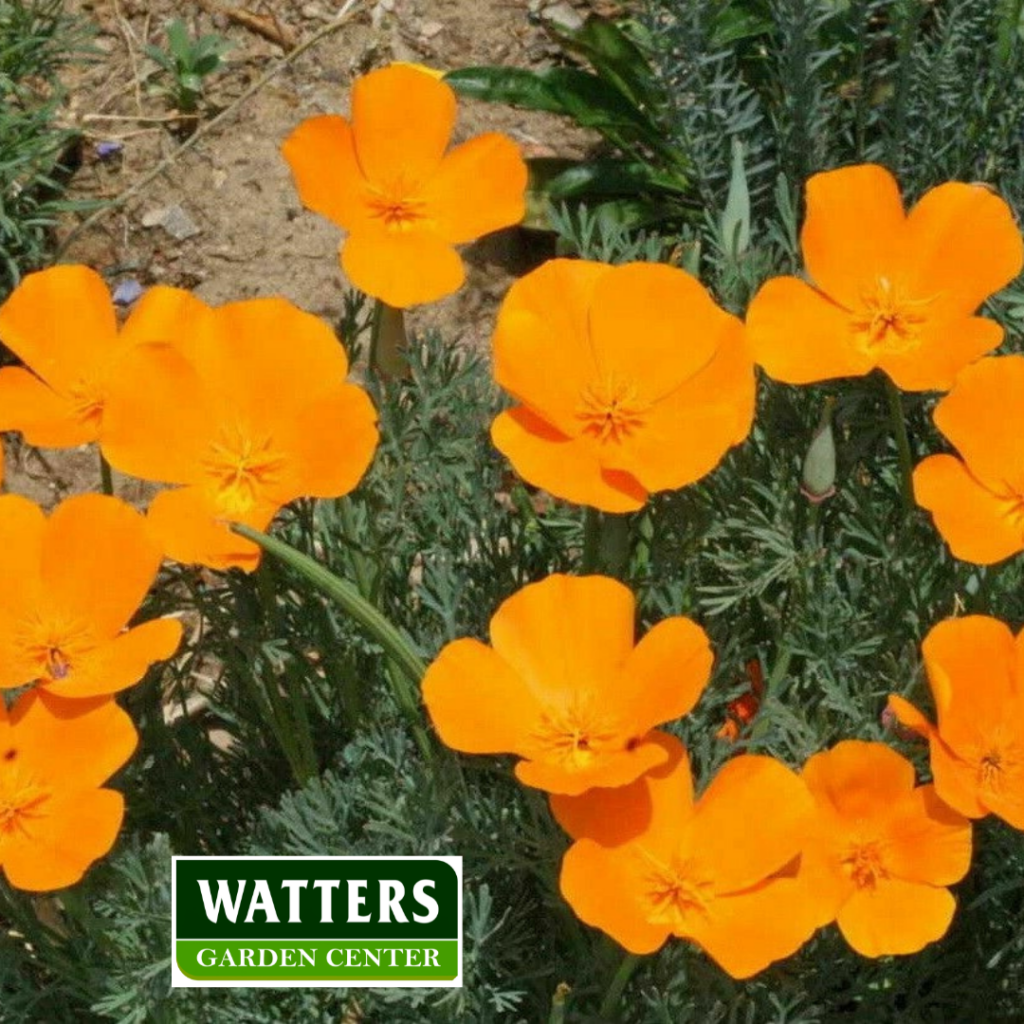
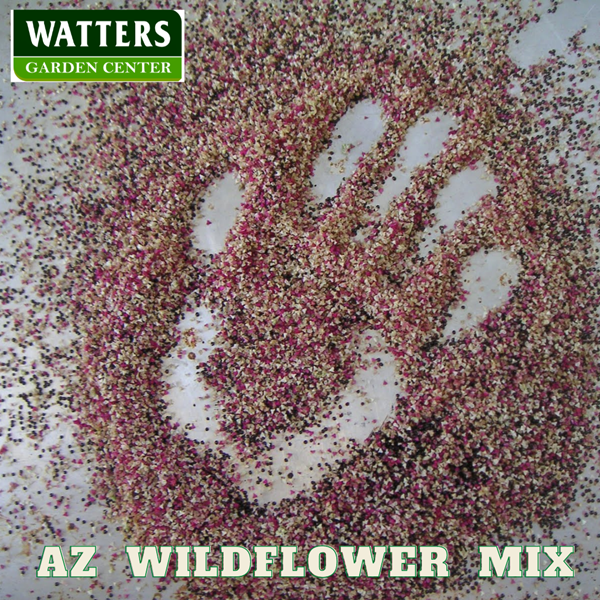
  • Take advantage of the unpredictable January weather and direct sow wildflower seeds that germinate better with the stratification of freezing and thawing, like larkspur, poppies, and Nigella.
Celery

USDA Zone 8 Verde Valley, Sedona, Kingman, Humbolt

  • Zone 8 gardeners have some great options.
  • Indoor Vegetables and Herbs
  • If you haven’t started your celery, parsley, leeks, and onions, get them seeded right away. Peppers can also be sown indoors since they need extra time to reach transplant size for April planting.
  • Cool-season crops such as broccoli, cabbage, cauliflower, kale, lettuce, and other cooking greens multiply quickly. Start now so they are ready for early spring planting in March.
  • Outdoor Vegetables, Herbs, and Flowers
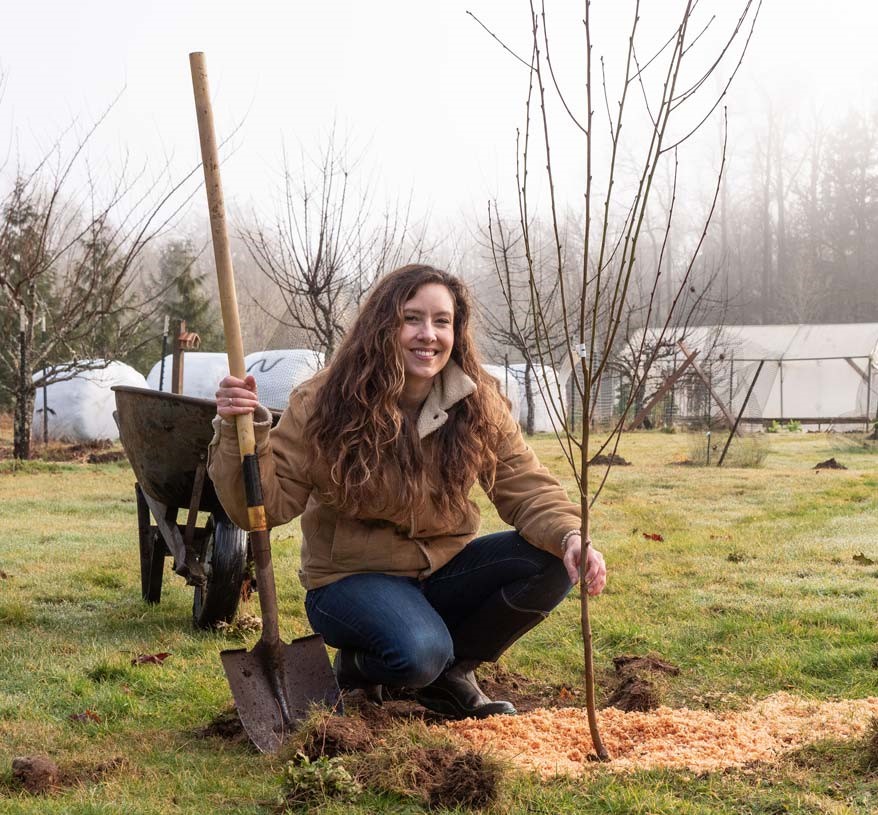
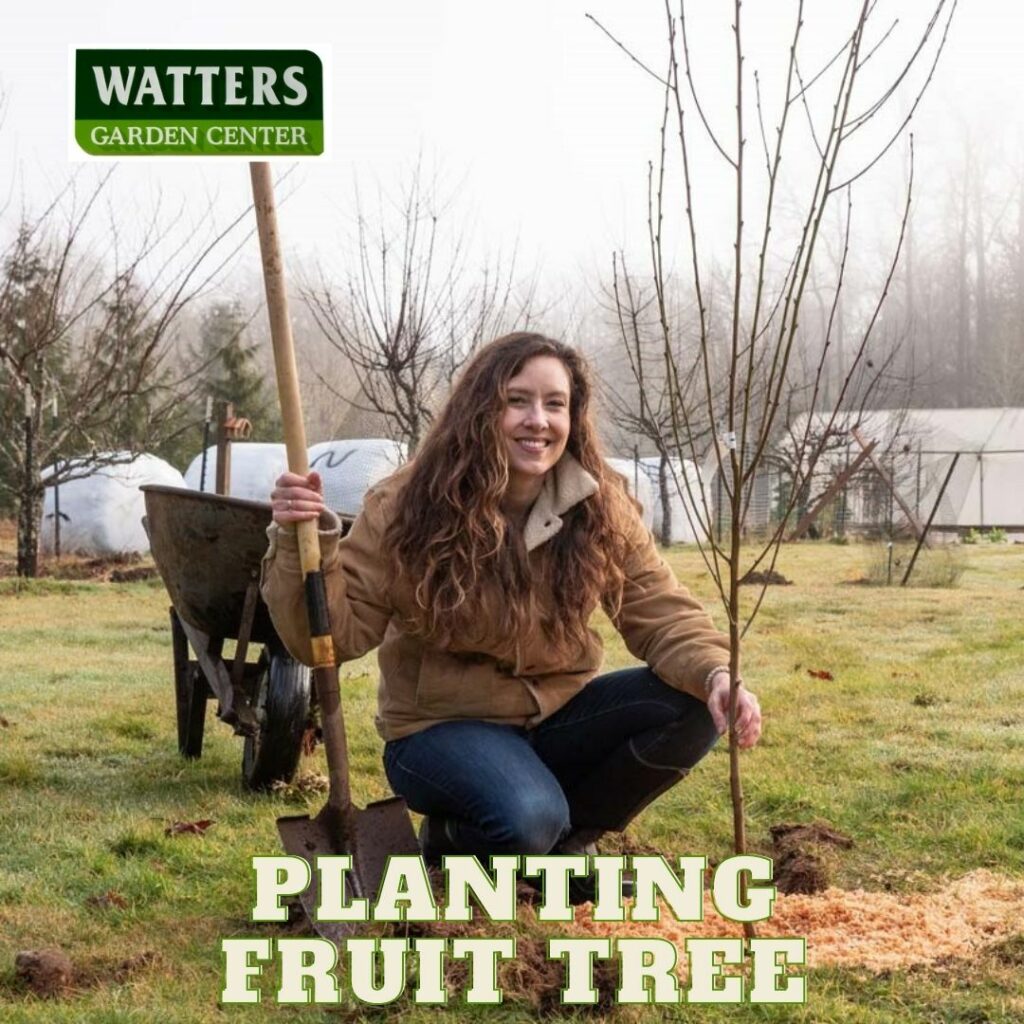
  • When the soil can be worked, bare-root asparagus and strawberry plants can be planted as they become available at the garden center. January is also an excellent time to plant fruit trees.
  • You can direct sow root vegetables and hardy greens, such as beets, bok choy, carrots, radishes, even peas. You can transplant onions, broccoli, cabbage, chard, and kale seedlings by the end of January. Harden them off first, and keep the row covers handy.
Ornamental Kale

USDA Zones 9+ Phoenix, Tucson, and Yuma

  • In January, the cool growing season is in full swing for Zones 9 and 10.
  • Indoor Vegetables, Herbs, and Flowers
  • Start seeds of eggplant, kale, lettuce, melon, peppers, squash, tomatoes, and basil so that transplants will be ready to harden off as the weather heats up in April.
  • Go ahead and start flower seed indoors of cosmos, marigolds, sunflowers, and zinnia.
  • Outdoor Vegetables, Herbs, and Flowers
  • Transplant seedlings of broccoli, cabbage, cauliflower, chard, and Asian greens. Be sure to succession sow to keep the harvest coming. It’s also safe to direct sow several vegetables in your gardens like arugula, cabbage, carrots, kale, lettuce, onions, peas, radishes, spinach, and turnips.
  • Now, cold hardy fruit trees, such as peaches and nectarines, can be planted. Plant tender fruits like citrus until the weather stays warm.
Garden Class Banner

Watters Free Garden Class Series Saturday’s @ 9:30 am

Join the garden fun as we share local tips, tricks, and garden advice sure to make a difference in your garden this year.

Jan 15 – Happy, Healthy Houseplants with Professional Style

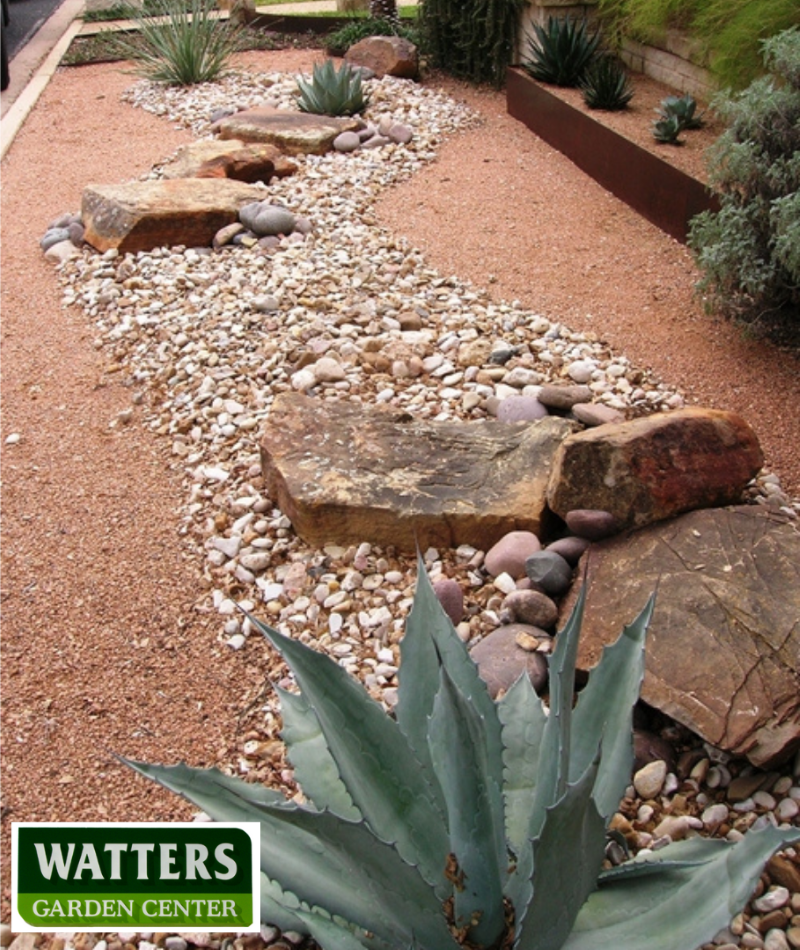
Jan 22 – Top Local Landscapes with Flair

Jan 29 – Why January is the Month to Plant Wildflowers

Until next issue, I’ll be helping local gardeners here at Watters Garden Center.

Ken Lain can be found throughout the week at Watters Garden Center, 1815 W. Iron Springs Rd in Prescott, or contacted through his website at WattersGardenCenter.com or Top10Plants.com.

50 Things You Can Compost in the Gardens

by Ken Lain, the mountain gardener

Audible Stories Provided by SignalsAZ.com

Happy New Year – A Prosperous New Start!

There has been a 29% increase in gardeners helped here at Watters Garden Center since the pandemic, and the trend is growing. The significant increase represents more than growth. We are helping many people new to gardening all together. It’s inspiring! Gardeners experienced first-hand what plants and gardening can do for the community and the importance of a healthy lifestyle.

compost bin

Soil is everything when it comes to gardening, and I’m not talking dirt. Enrich your garden soil, and thriving plants naturally grow. Throw lettuce, tomato, flowers, or trees into crummy mountain dirt, and struggle is soon to follow.

January is ideal for preparing new garden beds for spring planting or refreshing soils from last year. Now is the time to amend your gardens with manure, mulch, and compost.

I was helping a proud gardener with her new compost bin this week.  Her question was, “what can I put in my compost bin?” Here are the 50 things you can compost for healthier gardens. There are two basic compost materials, greens and brown (nitrogen-rich and carbon-rich).

Greens for composting

Greens for Your Compost Bin are nitrogen-rich additions to your compost pile. They tend to have lots of moisture, break down quickly, and provide a quick burst of heat to your bin. While they are labeled greens, technically, any plant matter works. Coffee grounds are brown in color, but they’re rich in nitrogen, so considered green for composting purposes.

25 green ideas added to your compost bin:

  1. Broccoli stalks
  2. Citrus rinds
  3. Coffee grounds
  4. Cooked plain pasta
  5. Cooked plain rice
  6. Corn cobs
  7. Corn husks
  8. Dead plants (as long as they aren’t diseased)
  9. Dried herbs and spices that have lost their flavor
  10. Eggshells
  11. Fresh leaves
  12. Fruit and vegetable peels
  13. Grass clippings
  14. Holiday greenery from wreaths and swags
  15. Houseplant trimmings
  16. Melon rinds
  17. Pinched, or deadheaded flower
  18. Seaweed
  19. Sod that you’ve removed to make new garden beds
  20. Spent bulbs that you used for forcing indoors
  21. Stale bread
  22. Tea leaves and paper tea bags
  23. Thinnings from the vegetable garden
  24. Vegetables that aren’t suitable for eating anymore
  25. Weeds that haven’t gone to seed
browns for composting

Browns for Your Compost Bin are the carbon-rich materials that add aeration to the pile and structure to compost. They break down slowly, so it’s a good idea to chop each relatively small.

25 brown ideas added to your compost bin:

  1. Barnyard bedding from chickens and horses
  2. Bedding from hamsters, guinea pigs, rabbits
  3. Brown paper lunch bags, shredded or torn
  4. Brown paper shopping bags, shredded or torn
  5. Chopped twigs and small branches
  6. Coir liners from hanging baskets
  7. Excelsior
  8. Fall leaves
  9. Fallen bird’s nests
  10. Nutshells (avoid walnuts)
  11. Shredded newspaper
  12. Shredded office or school papers
  13. Shredded, non-glossy mail
  14. Torn corrugated cardboard boxes, non-glossy coatings
  15. Peat or coir from seed starts
  16. Pine needles
  17. Pine cones
  18. Pressed paper egg cartons, torn into small pieces
  19. Raffia
  20. Sawdust from untreated wood
  21. Straw
  22. Toilet paper, paper towel, or wrapping paper tubes
  23. Used napkins
  24. Used paper coffee filters
  25. Wood chips

These items are safe to compost in your gardens. Not everything on this list will be for every gardener. Worried about pests in the compost, some decide to forgo composting grains like rice, pasta, and bread. Others choose to recycle newspapers rather than compost. An additional guide to Composting for Better Gardens.

Meat: While you can technically compost meats, dairy, and fats, they are left from the list because extra care is needed to compost safely.

Poops – Manures carry a variety of parasites that make them less safe to compost. It’s best not to add poop to your compost pile. If you do, don’t use poopy compost around edible plants.

4 to 1 – For super-fast compost, pay attention to these proportions. You should have about four times as many browns as greens. If your bin gets wet and smelly, add more browns and cut back on the greens for a bit, then give it a turn. If the contents of your bin aren’t breaking down, add some greens, turn it, and it should start compost faster. If the goal is to avoid sending your organic matter to landfills, more than composting, you don’t need to worry as much.

Until next week, I’ll be helping local gardeners compost smarter here at Watters Garden Center.

Ken Lain can be found at Watters Garden Center throughout the week, 1815 W. Iron Springs Rd in Prescott, or contacted through his websites at WattersGardenCenter.com or Top10Soils.com.

9 Places for the Best Desert Groundcovers

by Ken Lain, the mountain gardener

  • What are the best ground cover plants for desert landscapes?
  • Drought tolerant ground cover you can walk on.
  • Where should you plant ground cover?
  • Arizona ground cover plants.
  • Xeriscape ground cover
Audible Stories Provided by SignalsAZ.com
Neon Sedum Creeping Ground Cover

Mountain landscapes are difficult for plants, especially if you want to keep them low maintenance. Ground-hugging plants are the perfect solutions in an arid climate where rock lawns are the norm and growing conditions challenging.

Do any search online, and you’ll find a lot of bad advice for mountain gardens. You really must verify the sources and confirm with your local garden centers. But, hey, that’s why this column has so many loyal readers! Thank you:)

This list of the best groundcovers is based on local gardeners who shop here at Watters Garden Center. This is not an all-encompassing plant list, merely the most popular found in many neighborhoods. Botanical names and online links are provided so you can reference more varieties. Ensure you receive the first dibs on next year’s plants and pre-order your spring 2022 delivery. Order now, and they are delivered directly to the garden center with free shipping this spring.

Sunny Spots

This is the most challenging garden spot in every yard. High altitude sun, persistent wind, and extra heat reflected off retaining walls and rock lawns make sunny spots especially hot.

Fragrance Where People Gather

Whether from their foliage or blooms, some plants just give off more pleasing scents than others. Fragrant plants should be used in specific parts of our yards. Use this list of plants where guests visit over a glass of wine, at a backyard BBQ, and sit by the fire pit. Here are our favorite plants that smell better than most.

Slopes

A backyard with a sheer wall or hill covered in granite boulders has its own challenges. Choose plants with strong roots, and they hold the soil together, controlling erosion.

To Soften Walls

So many raised beds and walls are sterile and in need of softening. These ground covers ease and disguise strong lines in hardscape elements.

Heuchera Marmalade Coral Bells groundcover
Heuchera Marmalade Coral Bells Groundcover

Where Weeds Grow

Choke weeds out with plants that overtake and squeeze them out. Here’s a list of ground covers that are so hardy they choke out weeds, even the most persistent.

Vinca minor as ground cover

Wildfire Protection: Reduced Fuel Zone

These plants have high moisture contents, so far less prone to catch fire. Growing a ground cover for fuel reduction is often overlooked but definitely worked into the gardens in areas prone to wildfires.

For High-Traffic Area

Ground covers make excellent replacements for the traditional lawn. Here are the plants that withstand foot traffic and still look good.

Animal Resistant/Proof

As we build ever deeper into the forest and mountain valleys, we encounter wild creatures that see our gardens as their personal buffets! Here’s a list of low-profile plants mountain-dwellers find utterly distasteful. Some even have a repellant effect.

Shady Spots

Spots under a tree, a deck, or eaves need something that ‘pops’ to bring dark spaces alive. Here are my local favorites that outshine the rest in a shady spot.

Mom and kids at a container garden class

2022 Free Garden Class Announcement for next year is very exciting. January classes and instructors are finalized, and the rest of the Spring schedule is coming together nicely. Next year’s categories are going to be certified organic! Here are the topics for the first classes of 2022.

January 15 @ 9:30 am: Houseplant with Professional Style

January 22 @ 9:30 am: Top Landscape Designs with Flare

January 29 @ 9:30 am: Why January is the Month to Plant Wildflowers

Until next week I’ll be helping local gardeners with gift cards and selecting groundcovers here at Watters Garden Center.

Ken Lain can be found throughout the week at Watters Garden Center, 1815 W. Iron Springs Rd in Prescott, or contacted through his website at WattersGardenCenter.com or Top10Shrubs.com.

Wildflowers for Christmas & Other Gifts for Gardeners

Wildflower Seed Mix

by Ken Lain, the mountain gardener

  • How do you grow wildflowers from seed?
  • When should wildflower seeds be planted?
  • How do you plant wildflower seed?
  • Gift ideas for gardeners.
  • The best wildflower seed mixes.
  • Watters gift cards as stocking stuffers.
Audible Stories Provided by SignalsAZ.com
Poppy Holder in white apron

Gardeners are some “tough customers” on our annual gift lists; it’s hard to know what they like or need. Here are a couple of suggestions:

First: Wildflower seeds for the gardener in your life trigger winter-long dreams of spring.

Second: A Watters gift card as a stocking stuffer is always well received. Now, if your wife, mom, or dad really wants a sweater for Christmas, get them a sweater! But if folks you care about really love their gardens, a gift card from Watters makes perfect sense. Next spring, they can stop by and pick out precisely what they want or really need. We all know it’s not the same as the garden plants they’ve been thinking about, but, hey, it’s winter! Gardeners will understand.

Don’t have time to view the entire article, here are the highlights:

  • The high country of Arizona has the perfect climate for wildflowers.
  • ‘Arizona Mix’ is the seed of choice for wildflower purists.
  • Wildflower seeds need cold and freeze to grow most successfully.
  • The seed should be spread no later than Valentine’s Day.
  • Plant wildflower seed in an area that receives at least six hours of sunlight daily.
  • Pour a bag of Watters Premium Mulch into a wheelbarrow and mix in the seed.
  • 7-4-4 ‘All Purpose Plant Food’ spread over the entire seedbed.
  • Gardeners love Watters Gift Cards as holiday gifts.

I usually wait until the first rains in January to write about wildflowers. However, this year our winter weather has been absolutely perfect for spreading wildflower seed. With a few good storms, wildflowers will be spectacular this spring!

The high country of Arizona has the perfect climate for wildflowers, but there are a few secrets to successful sowing.

First, there’s the seed mix. I’ve been blending my own Yavapai Wildflower mixes for the garden purist for the past few years. These are genuinely wild seeds best suited for high elevation gardens. Some blends are Parade of Poppies, the Arizona Wildflower Mix, Butterfly, and Hummingbird blends. For those in the forest surrounded by deer, my Deer Resistant Wildflower mix. These are the best blends of genuinely wild seeds collected throughout the Rocky Mountains for Yavapai County.

The basic requirements of wildflower seeds are their need for cold and freezing weather, followed by the thaws of late winter and early spring. We have a few weekends to plant wildflowers, but we really should be finished by Valentine’s Day.

Four simple steps make a big difference between wildflower success and failure. Here are the specific planting techniques you can count on to guarantee breath-taking waves of wildflowers:

#1: Select and prepare the area. Wildflowers, except for those that are shade-loving, need a considerable amount of sunshine, so choose an area that receives at least six hours of sunlight daily during the growing season.

Planting in weed-free soil ensures optimal results, so pull out any growth you don’t want to mix with your wildflowers. Then rake the seedbed to loosen the top 1-2″ inches of soil. Use this step to add 7-4-4- All Purpose Plant Food into the garden bed. This combined step prepares the garden to receive your wild seed and encourages sturdy new flowers this spring. The food slowly releases and precisely what’s needed during the germination period for better flowers.

#2: Create your own hydro mulch. Many wildflower seeds are so tiny you can barely tell where they have been spread in the gardens. Here’s an insider tip: Pour a bag of Watters Premium Mulch into a wheelbarrow and mix in your favorite seed. Spread this seed-mulch blend over the prepared seedbed. This simple trick helps you see where your seed is placed, ensures good seed-to-soil contact, insulates the seed, and camouflages them from hungry birds.

Wildflower Seed Mix

#3 Humic Deep Roots: Sprinkle a top coat of Natural Guard Humic over the garden when your seed is spread. Completely natural, Humic supports deeper roots and more intense flower colors in spring. This granular nutrient is essential to spread over wildflowers to encourage hardier seeds.

#4: Keep them moist. Wildflowers require supplemental water if they don’t receive enough rain or snow in winter. Your new wildflower garden should receive 1″ inch of rain or 6″ inches of snow 2X per month until germination starting in February. Once your new seedling erupts from the garden, they are happier with 1″ of water per week. A layer of snow over your seedbed is perfect for wildflowers. It maximizes germination without extra watering.

#5: Spread the Magic: next fall, after the bloom is over and the flowers are drying and drooping to the ground, it’s time to spread the wildflower magic. I used an electric lawnmower and cut the garden back to the ground. You and do the job by hand, or even better, a weed whacker works well for this job. Besides pruning back your garden, this sends the next spring’s flowers flying through the gardens.

To my Jewish friends, I trust you had a blessed Hanukkah , to my Christian friends a jovial Merry Christmas, and to all others the Happiest of Holidays.

Until next week, I’ll be helping local gardeners with wildflowers and gift cards here at Watters Garden Center.

Ken Lain can be found throughout the week at Watters Garden Center, 1815 W. Iron Springs Rd in Prescott, or contacted through his website at WattersGardenCenter.com or  Top10Wildflowers.com.

Planting Your Christmas Tree After the Holidays

by Ken Lain, the mountain gardener

  • How do you keep a Christmas tree alive outside in the winter?
  • Can you put a cut Christmas tree in soil?
  • Buying a Potted Christmas Tree to Plant.
  • When should you plant your Christmas tree?
  • How to grow a Christmas tree in the garden.
  • What happens to live Christmas trees after the holidays?
Audible Stories Provided by SignalsAZ.com
Christmas Trees Display by the Front Door

The ‘Single Blue Pinyon Pine‘ is a local variety that gives a bold appearance to a rustic tree. Its blue color blends well in dry mountain landscapes as well as modern and Mediterranean-style gardens. The tidy appearance and unusual blue color are stunning. This tree is gaining popularity at farmers’ markets for its pine nut production. Even at a young age, the tree produces pine cones with melt-in-your-mouth nuts. Let it grow wild to 10′ or prune it right after its spring growth for a perfect Christmas tree shape.

January is an excellent month for planting evergreens. The timing is perfect for those who use living trees as decorations during the holidays and then mature after the holiday festivities are over.

Because of their waxy needles and high internal pitch, most conifers need surprisingly little water. Once they grow to your preferred size, our arid climate, dry soil, and extreme temperatures make them all the happier. This holds true for most other high-country natives like pine, cypress, cedar, juniper, and spruce.

They don’t like to sit in wet soggy soil. The tree’s internal metabolism slows to an almost stasis-like state. New root hairs will form along with next spring’s candle buds as long as the soil drains quickly. That’s why digging the right size planting hole and adding the correct soil amendments are critical for successful planting.

Here are six steps to plant a happy evergreen tree after the holiday celebrations are over, or any season for that matter.

Step 1 – The planting hole should be bowl-shaped, the same depth as your tree’s root, and three times the width. Plants do not need a bottomless pit; they thrive when able to stretch out just under the soil’s surface, searching for food and water. Rid the hole of rocks and debris more prominent than a golf ball.

Step 2 – Improve the soil removed to make the planting hole and blend one part Watters Premium Mulch into three parts native soil. The amount of mulch per plant should be equal to the size of the root ball. Use this blended soil to backfill around your new tree.

Step 3 – Evergreen trees are so sensitive to soggy soil it is highly recommended to plant them on a slight mound. Whatever you do, don’t bury the plant; keep the trunk from sinking below soil level. The top of the root ball you see in the grower’s pot should still be able to see sunlight once planted.

Step 4 – Foster strong spring growth by adding “7-4-4 All-Purpose Plant Food”, specifically designed for Arizona mountain plants. Just sprinkle the granules on top of the root ball and water. The slow-release organic food promotes a deep green color while encouraging thicker root formation each time you water.

Root and Grow

Step 5 – Promote deeper roots with ‘Root & Grow.’ Add this liquid rooting hormone when your tree is watered. It forces many new root hairs to grow into the surrounding soil. More roots mean a more vigorous plant. Use this root tonic once per month until new candle growth emerges in spring.

Step 6 – Top dress the planting area with a 3-inch layer of “Shredded Cedar Bark.” This extra layer of nature’s insulation holds moisture in, keeps weeds out, and protects from extreme temperature swings. It is like pulling a thick wool blanket over the roots when they are cold and shivering.

Water – Keep your tree moist but allow it to dry between watering. Give it a thorough soak twice per month throughout the winter. Once new growth is experienced, bump your water schedule twice a week during the first growing season, then once a week thereafter.

For exact planting details that include drawings and measurements, ask for my “Guide to Mile High Planting” the next time you visit the garden center. You might also like the helpful companion guide, “Mile High Watering.”

Woman Holding Merry Christmas Sign

From the Lain family to yours, we would like to wish our Jewish friends a blessed Hanukkah, to our Christian friends the merriest of Christmas, and all others the happiest of holidays:).

Until next week, I’ll be helping festive shoppers pick the perfect living Christmas trees here at Watters Garden Center.

Ken Lain can be found throughout the week at Watters Garden Center, 1815 W. Iron Springs Rd in Prescott, or contacted through his website at WattersGardenCenter.com or  FB.com/WattersGardenCenter .

Ideas To Enhance Side Yards

By Ken Lain, the mountain gardener 

Audible Stories Provided by SignalsAZ.com

Many mountain homes have a side yard that is not only long and narrow but treacherously steep. Good landscape design for such a layout is complicated at best, but when done well, it can tie the entire landscape together in a masterful manner. 

Sideyard Rock

Don’t have time to view the entire article, see the highlights below: 

  • Stone, pavers, and retaining walls turn ordinary side areas into extraordinary landscapes. 
  • The easiest and cheapest Southwest walkway is crushed granite. 
  • A walkway should measure 28-36” inches wide. 
  • Suppress weeds in an area by laying down weed fabric. 
  • Containers add style and interest to long walls with high fences. 
  • Think small or dwarf-sized plants if space is narrow. 
  • Enliven the area by featuring some exciting yard art or running water features. 
  • Pinterest Board that stimulates creative juices. 

At our home, Lisa and I have turned our landscape lemons into some truly “tasteful” lemonade.  Our most challenging project was to ease the steep access to our backyard. A flight of stairs with a different herb garden and wall art at each step, a commercial-sized pot of rosemary and sedum, with a “welcome” sign at the gate help visitors move effortlessly along from the bottom to the top into our home’s secret gardens. It is a real treasure, but it took some unusually creative design flair! 

A steep yard can be a demanding brain twister even for experienced gardeners, but it can be handled with some landscape skills applicable for almost any side yard project.  If this is the primary pathway from front to back, I encourage a no-nonsense walkway through the area to prevent tripping hazards. Measure to determine if there is room for a perennial bed, herbs, along the walkway. Also, determine if space allows for guiding a garden cart easily along the way.

Walkway

Walkways should be smooth and, on the level, measuring 28 – 36” wide.  The easiest and most inexpensive Southwest walkway is crushed granite packed down to a supportive hardness. This gold surface will wash away and needs replenishing every few years, but it suppresses weeds while coddling the bank account. 

Flagstone and concrete paving stones create contemporary styles that are suited to any expression of modern architecture. Yavapai Block is the most affordable local source, with block manufactured right here in Prescott.  

Whatever its surface material, a walkway should measure 28-36” inches wide. Straight paths that reinforce the tunnel-like effect of a long narrow yard, although not as desirable as long, curved pathways, sometimes are unavoidable, and can be made attractive. On the opposite side of the size spectrum, an invitingly wide walkway can serve as a fully functional patio. 

Alternatively, you may choose not to have a well-defined walkway but opt for a free-flowing path. Suppress weeds in the area by laying down weed fabric covered by mulch. This is best for side yards that are not used very often. If the side yard doesn’t get much traffic, and you need a place for the family dog to piddle, there is nothing like a camouflaged small patch of lawn. In areas with dense shade, select a shade-tolerant lawn mix like tall fescues. 

Best Plants for Side Yards 

Plants on Trellis

Containers add style and interest to long walls with high fences and eliminate having to dig in our unyielding mountain soils. But if you must plant directly into the ground, first determine how much sun will be in this part of the yard. Before heading to the garden center note whether the area is on the north or south side of the house.  If in doubt, bring iPad pictures of the space at different times of the day and my staff or I can read the shadows.  This will enable us to come up with the best plants for your side yard project. 

Think small or dwarf-sized plants if space is narrow. We have entire sections of the nursery set up for small spaces, and they include some of my favorite small-area plants: lavender, rosemary, mugo pine, spirea, dwarf burning bush, and carpet roses. For taller plants, look to Alberta spruce, tiny towers cypress, skyrocket junipers, and flowering redbud. Each proliferates in local gardens, is low maintenance, and can be planted now.  

A long narrow side yard of a large home can feel cavernous. Enliven and/or cozy-up the area by featuring some exciting yard art or the sound of running water from a small fountain. If walls enclose one side of the yard, feature antique trellises or old European courtyard doors against them. If a contemporary feel is more to your taste, try free-standing or wall-mounted colorful, angular metal pieces.  Grow vines like ivy, akebia, pyracantha, and honeysuckle in staggered groupings. 

I’ve put together a creative Pinterest Board that should stimulate your creative juices. Plan a design that excites your style and get it started. This is a great month to plant, especially winter evergreen varieties. If the project seems overwhelming, ask for help. Watters’ designers await your digital photos or can even come directly onsite for a detailed consultation

Until next week, I’ll be here at Watters Garden Center helping gardeners design beautiful side yards. 

Ken Lain can be found at Watters Garden Center throughout the week, 1815 W. Iron Springs Rd in Prescott, or contacted through his websites at WattersGardenCenter.com or Top10Plants.com. 

Top 10 Evergreen Shrubs of Winter +

Evergreen Shrubs of winter

by Ken Lain, the mountain gardener

  • What shrubs look good in the winter?
  • List of evergreen shrubs with pictures.
  • What shrubs stay green all winter?
  • Hardy winter shrubs.
  • What shrubs don’t lose their leaves in winter?
  • Do evergreen shrubs grow in winter?
Audible Stories Provided by SignalsAZ.com
Evergreen Shrubs of winter

Autumn colors are spectacular. The colors and textures are unique to the four seasons of the mountain west. As we wrap up the last Autumn leaves, the landscape can feel naked and bare. Deciduous plants, which lose their leaves through winter, often expose you to prying eyes, vehicle glare, and a yard that feels empty. Evergreens take center stage for the next few months, and you can feel when the landscape doesn’t have the right mix of evergreen trees and shrubs.

Not to worry, you will find the best selection of winter evergreens at your garden center now, and it’s an excellent time to plant one of your own. Here are the Top 15 most popular evergreen shrubs planted through winter

Blue Star JuniperThis is strictly a foliage plant. If you like the look of a blue spruce tree but lack the space for something that big, merely scale down and grow a Blue Star Juniper. With its short blue needles, it looks terrific when planted next to shrubs with golden foliage.

Boxwood in landscape

Boxwood– is a small, rounded evergreen that forms tufts of growth resembling clouds if left unpruned. This slow-growing dwarf form is ideal for edging borders along pathways or around flower beds. Well-suited for topiary and containers and resistant to boxwood leaf miners.

Euonymus Moonshadow wintercreeper

Euonymous is the most popular of the hedge plants. Although its bright year-round foliage appears almost festive, this plant is tough as they come. An ideal hedge can be sheared or left to grow into a natural form dense enough to make an excellent visual and sound barrier. For long hedgerows, a combination of the two varieties creates a more exciting entity.

Silver Berry Gilt Edge

Gilt Edge SilverberryA splendid Arizona native, this shrub sports a combination of golden-yellow margins on bright green foliage that provides incredible year-round landscape interest. It’s superb as a hedge or low screen that tolerates heat and wind and requires little maintenance. Tiny, fragrant, silvery flowers followed by ornamental red fruit. Impervious to both javelina and deer.

Heavenly Bamboo

Heavenly Bamboo is evergreen with bright red highlights through winter. Bamboo-shaped foliage is graced with clusters of white flowers in spring that form red berries as summer heat arrives. Think versatility with this 3-foot tall plant, as it is happy in any amount of sun, most soils, and tolerates any amount of cold or heat.

Holly in winter landscape

Holly is a broadleaf evergreen that usually grows 6′ x 8′ feet tall. The holly leaves develop a darker color that contrasts nicely against the bright red berries. Perfect for north-facing borders, screens, hedges, and for foundation plantings. Easy to grow and impervious to mountain wildlife.

Hawthorn in Garden

Indian HawthornThis easy-to-grow evergreen produces vast clusters of fragrant, pearl-pink flowers. Perfect for planting along driveways and parking medians where reflected heat is an issue for many other plants. This spring-blooming evergreen loves Arizona heat!

Juniper Mint Julep

Mint Julip Juniper– is an improved juniper is a crisp wintergreen perfect for large hedges, privacy screens, and specimen plantings. It is so tolerant of salt, it can be used near sidewalks, driveways, and roadways. It is rarely damaged by animals, such as deer, javelina, elk, and packrats.

Mugho Pine

Mugho Pinewith its dense, symmetrical growth and compact, rounded form, this dwarf pine is perfect for confined spaces. Stunning green foliage takes on a golden hue during colder months. Its slow habit makes this evergreen an ideal specimen in smaller gardens or massed to make a bold statement in more significant landscapes.

Oregon Grape Holly

Oregon Grape Holly is the perfect mountain evergreen often mistaken for holly. Solar yellow flowers cover the entire plant in spring, followed by a summer berry that is attractive and edible. Heading into winter, the leaves turn a mixed cranberry and orange color that remains until spring blooms. This plant loves sun, heat, wind and requires less water than many natives.

Privet

Privet has the same look as photinia but may be a better choice for a residential landscape. Growing to only six feet high, it forms a thick dark green hedge. The waxy leaves retain moisture within the plant’s structure. The result is a lower maintenance hedge with lower water needs and fewer bug problems than its red-tipped counterpart.

Cotoneaster red clusterberry

Red Cluster Berry Cotoneaster has white flowers in spring, evolving to red berries that remain on the plant through winter. It is a welcome food source for feathered friends hanging around after welcoming in the new year. Growing 10′ feet tall and wide, it loves the sun and is easy to grow.

Yew Spreading in raised bed

Spreading Yew has rich green needles that border on black. The 4′ x 6′ foot spread is used as a hedge, screen, or border in a shaded or dapple sunspace. Scarlet berries show off against all the wintergreen and are highly attractive to birds.

Winter Heaths – first-time growers of these alpine evergreens are impressed by their long blooming period. Winter heaths, Erica darleyensis, live up to their name, putting out flowers in the most unlikely season: Winter. If the climate and conditions are suitable, they flower from late winter right through spring.

Yucca with snow

Yucca – Massed together, yuccas form an impressive display during their bloom period. ‘Garland’s Gold’ and ‘Golden Sword’ are bold choices with or without remarkable flowers.

Until next week, I’ll be helping local gardeners plant the best evergreens here at Watters Garden Center.

Ken Lain can be found at Watters Garden Center throughout the week, 1815 W. Iron Springs Rd in Prescott, or contacted through his websites at WattersGardenCenter.com or Top10Shrubs.com.

34 Perennials to Cut Back in Fall & How to Grow Them

Perennial Flower Collage

by Ken Lain, the mountain gardener

  • What perennials should not be cut back in the autumn?
  • Pruning Perennials.
  • Should all perennials be cut back in the fall?
  • Can you cut back perennials before frost?
  • When should perennials be cut back in the Autumn?
Audible Stories Provided by SignalsAZ.com
Collage - Bachelors Button Perennial

Most perennial hibernate underground through winter. Some are downright ugly after our first hard frost and harbor pest and disease unless cut back by the end of the year. You protect these perennials for the cold months ahead and spark healthier new growth next spring by cutting back these perennials. Here are perennials to cut back in the fall.

This is not a recommendation to cut all perennials back to the ground this fall. Some need their foliage for winter protection and should be pruned back the first days of spring. Follow these recommendations, and you will have spectacular results next year.

Iris Iris germanic blooming in the garden
Bearded Iris

Bearded Iris, Iris germanic – the tall foliage of bearded iris flopping early in the growing season. This tall foliage protects iris borers, aphids, and fungal diseases. Cut the flower stalk as soon as it’s blooming and remove any damaged or diseased leaves. Leave healthy foliage until autumn, then cut the entire plant back to 6 inches, and dispose of the foliage, rather than composting it.  How to Grow Iris.

Bee Balm, Monarda didyma – Even the most resistant varieties can succumb to powdery mildew. If you’ve had problems with disease, cut the plant back even before fall. Healthy new growth is left until spring. Selective thinning can be done with the remaining seed heads left as food for winter birds.

Blackberry Lily, Iris domestica – is best pruned back in fall to keep foliage from collapsing. Limp foliage causes the crown to rot and invite borers. Cutting it back also stops unwanted self-seeding, preventing the plant from becoming invasive.

Blanket Flower, Gaillardia blooming in a container
Blanket Flower

Blanket Flower, Gaillardia grandiflora – is mountain hardy, and cutting back the spent stems improves vigor. This perennial appears fuller and healthier with fall pruning. Deadhead flowers throughout the growing season promote a continuous bloom through the growing season.  How to Grow Blanket Flower.

Bronze Fennel, Foeniculum vulgare – can be found accenting many local gardens. The foliage is food for swallowtail caterpillars that often strip the plant of leaves by fall. If this happens, it no longer provides use to the plant and can be cut back to the ground.

Catmint, Nepeta in the landscape
Catmint

Catmint, Nepeta – respond well to pruning throughout the season to refresh and tidy the foliage. Winter cold damages the vegetation, so start your spring cleanup in the fall.

Columbine, Aquilegia – remove columbine foliage showing leaf miner damage, and clear out any debris around the base of the plant. Columbine sends out growth early in spring and appreciates not having old foliage from the previous year. To prevent self-seeding, remove flowers after blooming. Leave healthy foliage to absorb energy throughout the growing season, and prune after frost.  How to Grow Columbine.

Corydalis, Corydalis lutea – is hard to kill. Tame its enthusiastic self-seeding habit by removing seed heads and cut back foliage after a hard frost. If summer has damaged foliage, cut back the plant to its basal leaves closest to the ground.

Crocosmia should be cut back when blooming ends to encourage new flowers. The seed heads can offer interest, but the foliage eventually fades through cold months. Cut back dead foliage and remove debris.

daylilly Hemerocallis blooming by a walyway
Daylily

Daylily, Hemerocallis – remove spent flower stalks after blooming to encourage new flowers on reblooming varieties. Daylilies respond well to shearing in autumn. If you can’t get to cutting back all the dying foliage in fall, at least make a point to remove any diseased parts of the plant.

False Indigo, Baptisia australis – is one of those plants that flop in the middle if they aren’t sheared back after blooming. Many gardeners like to leave the seed pods and choose to stake the plants. The foliage turns black with frost, so cutting back false indigo in the fall is recommended.

WHY FLOWERS DIE & WHAT TO DO ABOUT IT

Golden Marguerite,Anthemis tinctoria – pruning to the crown encourages new basal growth that protects and sustains the plant through winter.

Goldenstar, Chrysogonum virginianum – often has problems with powdery mildew. Remove and destroy diseased foliage in the fall. Cut back spent flower stems to maintain their attractive ground cover appearance.

Ground Clematis, Clematis recta – is a clump clematis blooms late in the summer and produces attractive seed heads. After a hard frost, it becomes wet and slimy. This bloomer flowers from new growth, so do not be afraid to clean it up in the fall.

Hardy Begonia, Begonia grandis – remove spent blooms throughout the growing season to encourage repeat blooming. Frost will blacken and collapse the foliage, and when left, often causes crown rot. Prevent this by cutting back the plant in autumn.

Helianthus, Helianthus laetiflorus – are members of the sunflower family that finish blooming toward the end of summer and go downhill from there. Deadheading does not improve their appearance, and the tall stems are guaranteed to break and flop. Cut them back to the ground for aesthetics.  How to Grow Sunflowers.

Hollyhock Mallow, Malva alcea – blooms throughout summer into fall and benefits from deadheading to encourage more flowering. Cut back the plant to basal foliage after it’s done blooming to maintain a healthy appearance.

Japanese Anemone, Anemone hupehensis – Beetles love this plant and are often defoliated by fall. If the beetles don’t get to your plants, the foliage still turns black and becomes unattractive after frost. Cut it back after freezing weather turns the foliage an unhealthy color.

Leopard Plant, Farfugium japonicum – are predominantly grown for their foliage. The leathery leaves grow several inches in length and width, and they emerge with a dark purple color before turning to deep green. After a hard freeze, the foliage turns to a dark mush, so feel free to cut it back.

HOW TO GROW WILDFLOWERS

Ladybell, Adenophora liliifolia – flower in early summer and can be cut back after flowers diminish. The plant is not prone to pests or diseases, and the basal foliage should remain fresh until spring.

Masterwort, Astrantia major – is deadheaded through summer to prolong the flowers. If conditions are dry, the foliage will begin to yellow and can be sheared to the crown. Allow healthy new growth to remain through the winter. If no yellowing is present, leave the plant for spring cleaning.

Meadow Rue, Thalictrum aquilegiifolium – it doesn’t really matter when you cut back meadow rue. Once the blooms are done for the season, pruning in the fall is one less thing to do in the spring. Some varieties will self-seed. If that is desirable, let it go until spring.

Mountain Bluet, Centaurea montana – tends to become black and unsightly with the first frost and can be cut back in autumn. If you already sheared them back in late summer and only basal growth is present, you can allow that to remain.

Echinacea - Cheyenne Spirit Coneflower  Tanacetum coccineum
Painted Daisy

Painted Daisy, Tanacetum coccineum – can quickly rot in wet soil, so plant in well-drained soil. Deadhead plants throughout the season to encourage reblooming. Plants will turn brown after frost, so prune dead foliage by the end of the year. How to Grow Coneflower.

Penstemon, Penstemon barbatus – does not like wet feet and should be planted in well-drained soil. The foliage usually declines toward the end of summer and can be trimmed back. Allowing older growth to flop would hold too much moisture around the crown that causes problems in spring. 

Peony, Paeoni
Peony

Peony, Paeoni –  need a period of cold to set buds for the next season. Their foliage is prone to mildew, so cut them back in the fall. Infected foliage can be removed in late summer. Healthy foliage will turn golden in fall, and that is the signal to prune.  How to Grow Peony.

Phlox, Phlox paniculata – is prone to powdery mildew, and even the resistant varieties can become infected in lousy weather. Prune and destroy all foliage and stems in the fall. Even if the plant is healthy, it will benefit from thinning to increase airflow and prevent disease.

HOW TO PREVENT POWDERY MILDEW

Orange Plume Poppy, Macleaya cordata
Poppy

Plume Poppy, Macleaya cordata– are nearly impossible to kill. They often become aggressive under optimal conditions. So cut back your plants before they go to seed unless you want plume poppies everywhere.

Salvia, Salvia nemoros – benefits from pruning several times during the growing season to prevent flopping and encourage reblooming. When blooming slows in the fall, cut back the whole plant to the new basal growth to keep it healthy for spring.  How to Grow Salvia.

Siberian Bugloss, Brunnera macrophylla – its foliage turns black and unattractive with the first frost. The plant is an early riser in the spring, so clear away old vegetation to prepare for new growth.

Sneezeweed, Helenium autumnale – usually does not finish blooming until mid-fall. By that time, it is often covered with powdery mildew. Once the flowers are spent, cut back the plant by half to promote healthy new foliage, making sure to remove diseased leaves. Pruning also encourages branching, reducing the plant’s need for support as it gets taller.

Solomons Seal, Polygonatum odoratum – pretty much disappears on its own after a frost or two. The leaves will undoubtedly drop. But if the stems remain, they can be pruned back to the ground.

Spiked Speedwell,Veronica spicata – Deadhead throughout the growing season to encourage reblooming. It only turns black and ugly if left for spring cleanup. For healthy new growth, ensure that the plant has regular moisture but good drainage over the winter.

Yarrow, Achillea – does not like to sit in cold, wet soil. By fall, most of its blooms are spent, and its foliage is flopping and possibly diseased. Cut it back in early fall, and new basil growth will fill in before frost.  How to Grow Yarrow.

Ken with Food 7-4-4

Here are the most Important perennials to cut back in autumn, but the list is extensive. If you need help, take a photo and bring it to Watters Garden Center for specific help.

Best Perennial Advice – fall is the most crucial feeding of the year for all flowers. Feed all your flowers with 7-4-4 All Purpose Plant Food for better flowers next year, whether you cut them back or not.

Until next issue, I’ll be helping local gardeners here at Watters Garden Center.

Ken Lain can be found at Watters Garden Center throughout the week, 1815 W. Iron Springs Rd in Prescott, or contacted through his website at WattersGardenCenter.com or Top10Flowers.com.

How to Grow Vanderwolf Pine

Vanderwolf Pine

by Ken Lain, the mountain gardener

Vanderwolf Pine

Vanderwolf is related to Arizona Pinion Pine by produces fluffy foliage that resembles a blue Cedar from a distance. It is remarkably resilient in dry Arizona soils. Makes a very graceful single specimen for front yards, parks, or expansive estate-sized landscapes. This distinctive Pine grows 12’x5′ with long, twisted, silvery-blue needles covering the dense branches. Carefree and easy to grow.

Botanical Name         Pinus flexilis

Common Name         Vanderwolf Pine

Hardiness Zone         4-7

Plant Type                  Evergreen Conifer Tree

Size                             15’x6′ feet

Shape                          Pyramidal

Foliage Color             Dark Green with blue

Landscape Uses         Privacy, Screening, Accents

Growth Rate              Slow to Moderate

Plant Tolerance         Very Adaptable

Standout Feature      Evergreen, Interesting Texture, Unique Pyramidal Shape

Planting a Vanderwolf Pine

Choosing a site for this tree should allow for its mature height of at least 15′ feet tall and 6′ feet wide. The canopy tends to grow in a narrow upright shape. Never plant trees deeper than planted initially in the pot. Doing so can cause rotting of the stem and death to the tree.

1. Dig a hole 2-3 times the width of the container but the same depth.

2. Check drainage by filling the hole with water. All water should drain away within 12 hours. If not, you have hardpan, and it will need to be penetrated – dig deeper & add a layer of gypsum.

3. Watters “Mulch” – Blend 1 part mulch with two parts soil taken from hole.

4. Score the root ball sides and bottom with a utility knife or pruners.

5. Blend Soil – Mulch – 7-4-4 Plant Food & Aqua Boost mixture, then pack firmly around the rootball.

6. Stakes & V-Strap – install stakes just outside the roots making sure the stakes are deeper than soil mix. Remove the original shipping stake. Use V-Straps around the trunk of the tree to support against the wind. Use one strap just under the tree canopy and a second 18″ below the first.

7. Build a well around the tree and water with “Root & Grow” mixture.

Water with Root & Grow every 2 weeks for the first 2 months.

Soil and Sun

This Pine grows in virtually any mountain soil conditions, including alkaline or clay soils. Ideally, it should have slightly acidic, well-drained soil. Still, its tolerant nature means it may be planted in difficult areas where other trees are hard to grow.

6+ Hours of the sun are needed during the growing season for the best spring growth and blue Autumn hues.

Water

Water newly planted trees regularly with a garden hose for at least one month (2 months in Summer). Automatic irrigation systems may not be sufficient initially. Water frequency will vary according to the season, exposure, and plant size.

April – Oct this Pine should be irrigated 2 x weekly.

Nov – Mar this Pine should be irrigated 2 x monthly.

Fertilizer

Feed 4x Times per Year with either 7-4-4 All Purpose Plant Food, Soil Sulfur, or Humic. Here’s the recommendation by season:

Spring = 7-4-4 All Purpose Food + Soil Sulfur

Summer = 7-4-4 All Purpose Food + Humic

September = 7-4-4 All Purpose Food

December = 7-4-4 All Purpose Food

How to Grow Camellias

Ice Angel Camelia

by Ken Lain, the mountain gardener

Ice Angel Camelia

Vivid rose-colored blossoms reach 2-3 inches wide with petals radiating out from a center of contrasting golden stamens. Ice Angle Camellia deserves front yard stature or admired on a patio or deck. Brings glossy foliage and elegance under dull shade trees. Well adapted to the acidic soils beneath oaks, native junipers, and maples. Grows 4’x4′ and loves shade gardens, containers, and raised beds.

The graceful waxen flowers of camellia are a symbol of easy elegance. Alabama has even chosen it for their state flower. Camellias have a reputation for being somewhat tricky to grow, but if you’re willing to meet their needs, they’ll reward you with a long bloom season just when you need it most in the early spring gardens.

History

Camellias are native to Southeast Asia. They’re part of a large genus, Camellia, whose most famous member is used in tea worldwide. Camellia sinensis flowers may be insignificant, but the leaves are grown and harvested to make teas of all kinds.

The beloved flowering varieties are more common in gardens. Camellia japonica is the only mountain variety willing to grow at colder elevations.

Botanical Name         Camellia japonica

Common Name         Camellia

Plant Type                  Evergreen Shrub

Mature Size               6’x5′ feet

Sun Exposure            under 6 hours sun to part shade

Soil Type                    Moist, well-drained

Soil pH                       Slightly acidic 5.5-7.5

Bloom Time               Spring

Flower Color Red, pink to white

Hardiness Zones        6 to 10

Native Area                Southeast Asia

Light

Camellias need protection from the hot afternoon sun. Morning sun and dappled afternoon shade is the ideal garden spot. As the plants grow, their foliage protects roots from damaging sun.

Soil

Camellias like to grow in well-drained, slightly acidic soil. The ideal soil pH range of 5.5 to 6.5; high pH stresses the plant with yellow foliage. Feed regularly with Watters 7-4-4 All Purpose Food to correct your soil’s pH. Camellia grows well in containers with a rich blend of Watters Potting Soil that efficiently controls the soil pH.

It’s vital to ensure the area you choose has well-drained soil. Avoid spots in your garden that are regularly soggy. If in doubt, dig a 12″x12″ hole and fill it with water. If it drains in 15 minutes or so, your soil is fast-draining and should work well for these flowering beauties.

Water

Water newly planted trees regularly with a garden hose for at least one month (2 months in Summer). Automatic irrigation systems may not be sufficient initially. Water frequency will vary according to the season, exposure, and plant size.

April – Oct this Shrub should be irrigated 2 x weekly

Nov – Mar this Shrub should be irrigated 2 x monthly

Fertilizer

Feed 4x Times per Year with either 7-4-4 All Purpose Plant Food, Soil Sulfur, or Humic. Here’s the recommendation by season:

Spring = 7-4-4 All Purpose Food + Soil Sulfur

Summer = 7-4-4 All Purpose Food + Humic

September = 7-4-4 All Purpose Food

December = 7-4-4 All Purpose Food

Blossoms

Planting

Camellias are a little pickier than most plants. If they’re planted too deep or mulched too heavy, the stems rot. Dig the planting hole the same depth as the root ball, then add a few inches of soil back into the hole to slightly decrease the depth. When you set the plant into the hole, the top of the root ball should be slightly above the surrounding dirt level. Fill in the gap, sloping the fill dirt up to the top of the root ball without covering it. Mulch lightly, no more than an inch.

Pruning

Prune just after their bloom season ends; simply prune when the flowers are done.